You want a fountain that makes your space feel calm and aesthetic but the moment you look it up, it feels more complicated than it should.
Pumps, tubing, containers, design ideas it quickly turns into something that feels “technical” instead of simple.
And then there’s the other problem. The good-looking fountains you see online or in stores are usually expensive or not built the way you actually want them in your home.
So most people stay stuck at the same point: they like the idea, but they don’t know how to actually build one themselves without wasting money or messing it up.
Here’s the truth. A homemade water fountain is not a complex project.
It’s just a simple water loop, water moves up, flows down through a design, and keeps circulating in a container.
Once you understand that basic system, everything else becomes easy to put together.
In this article, you’ll learn how to build a water fountain at home step by step using simple materials.
Why People Want a Homemade Water Fountain?
Most people don’t start this project because they want a “DIY fountain.” They start because they want a space that feels calm, fresh, and a little more alive.
A small water fountain does exactly that. It adds sound, movement, and a relaxing feel to any corner of a room, balcony, or garden.
But there’s a gap between expectation and reality.
People usually imagine it as something complicated, expensive, or “technical.” They think they need plumbing skills or fancy materials.
That’s the first mistake. A homemade fountain doesn’t work like a built-in water system.
It’s much simpler, it’s just a closed loop where water keeps circulating using a small pump.
Another common misunderstanding is design. People focus only on making water flow, not how it will look in their space.
That’s why many DIY fountains end up looking messy or unfinished instead of aesthetic.
The third issue is cost expectation. Some think it will be completely free because it’s “homemade,” while others assume it will still cost like a store-bought fountain.
In reality, it sits in the middle, you can build something good with low-cost materials, but not zero cost.
So before starting, it’s important to understand what you’re actually building: not a complex water system, but a simple decorative flow setup that you control and design yourself.
Once you clear this confusion, the rest of the process becomes much easier and more enjoyable.
What You Need to Build a Water Fountain at Home?
You don’t need a long list of tools or professional materials to build a water fountain. Most of what you need is simple and easily available in local markets or even at home.
The main item is a water container. This is your base. It can be a ceramic pot, a plastic bucket, a clay planter, or even a decorative bowl.
The only rule is that it must hold water properly without leaking.
Next is the submersible water pump. This is the heart of your fountain. It pushes water upward so it can flow and circulate again.
You can find small fountain pumps or aquarium pumps easily. The size depends on how big your fountain will be.
Then you need tubing or pipe. This connects the pump to the top point where water will come out. Flexible plastic tubing works best because it’s easy to adjust.
After that, you need decorative materials. These are not just for beauty, they also help hide the pump and structure. Stones, pebbles, gravel, small rocks, bamboo pieces, or even small ceramic items can be used.
You may also need a few optional items like waterproof sealant (if your container has small leaks), LED lights for night effect, or artificial plants to improve the look.
The key thing to remember is this: every material has a purpose, either to move water, hold water, or make it look better.
You don’t need expensive items. You just need the right combination.
How a Water Fountain Actually Works?
Before building anything, you need to understand how a homemade fountain actually works. If you understand the system, you won’t feel confused during setup.
A water fountain works on a very simple loop system. There are only three steps:
First, water sits in a container at the bottom. This is your reservoir.
Second, a small electric pump sits inside this water. When you switch it on, the pump pulls water in and pushes it upward through a tube.
Third, water comes out from the top point like a stone stack, bamboo pipe, or decorative outlet and flows back down into the same container.
Then the cycle repeats again and again.
That’s it. No outside water source. No drainage system. Everything stays inside one container.
The reason this works is because the pump keeps recycling the same water. As long as there is enough water in the container to cover the pump, the system keeps running.
Two important things control how it looks:
- The strength of the pump (how high water goes)
- The design at the top (how water falls or flows)
If the pump is too strong for a small setup, water will splash. If it’s too weak, water won’t rise properly. So balance matters.
Once you understand this simple loop, the entire project becomes less about “building something complicated” and more about arranging parts in a smart way.
Step-by-Step Guide to Making a Homemade Water Fountain
Now that you understand the basics, let’s build it step by step in a simple way.
Start by choosing your container. Place it where you want your fountain to stay because once filled, it becomes heavy and difficult to move.
Next, place your submersible pump at the bottom of the container. Make sure it sits flat and stable. Attach the tubing to the pump outlet and run the tube upward.
Now build your fountain structure. This is where creativity comes in. You can stack stones, place a bamboo stick, or use a small pot to create a water flow point.
The tube should reach the top of this structure so water can come out from there.
After that, hide the pump and tubing using stones, pebbles, or decorative material. This step is important because it turns a “setup” into a “fountain.”
Once everything is arranged, slowly add water into the container. Make sure the pump is fully covered with water before turning it on.
Now switch on the pump and observe the flow. Check if water is coming out smoothly and falling back into the container without splashing outside.
If something feels off, adjust the tube height or stone placement until the flow looks balanced.
That’s your basic fountain setup complete.
How to Design Your Fountain So It Looks Aesthetic?
A working fountain is easy to build. A good-looking fountain takes a little thought.
Start with a style. Don’t just randomly place stones. Decide what you want:
- Natural rock waterfall
- Minimal modern indoor fountain
- Zen bamboo fountain
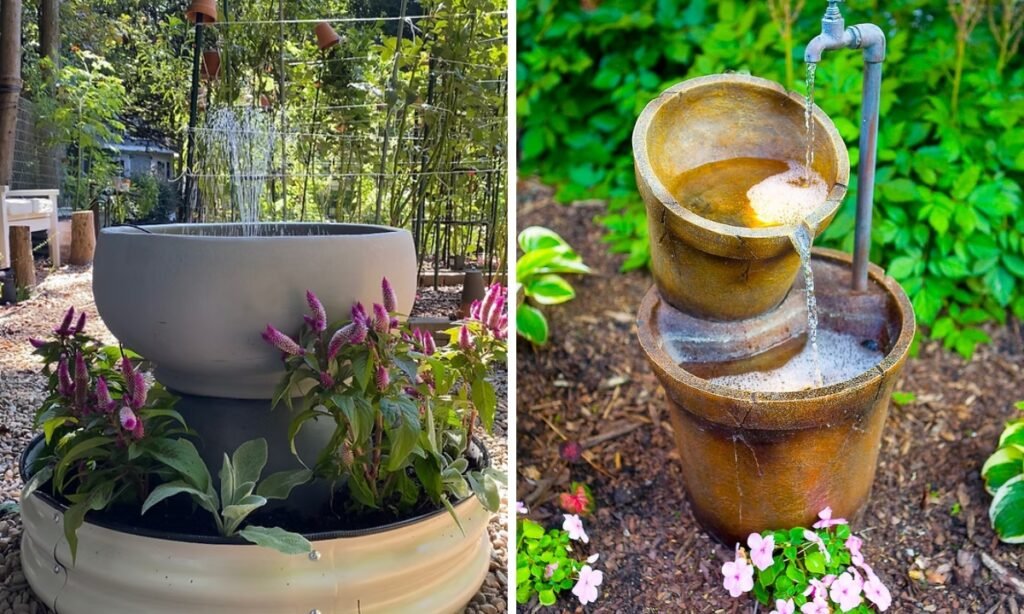
- Decorative pot overflow style
Each style changes how you arrange materials.
For a natural look, use uneven stones and hide most of the structure so it looks like water is naturally flowing through rocks. For a modern look, keep shapes clean and use fewer elements.
Lighting also changes everything. Adding a small LED light under or behind water can instantly improve the look, especially at night.
Plants also help. Small indoor plants or artificial greenery around the fountain make it feel more alive and less artificial.
The biggest mistake people make is overcrowding. Too many decorations make it look messy instead of aesthetic. Keep it simple and let water remain the main focus.
Think of it like this: the fountain should feel calm, not busy.
Indoor vs Outdoor Water Fountain Setup
An indoor fountain and an outdoor fountain may use the same basic system, but the setup changes based on where you place it.
Indoors, your main focus is control. You want a quiet pump, a smaller container, and a design that doesn’t splash water outside.
Even small mistakes like too much water pressure or poor stone placement can create mess inside a room.
That’s why indoor fountains usually work better with compact designs like ceramic bowls, bamboo tubes, or small decorative pots.
Lighting also plays a big role indoors because it helps the fountain stand out without taking up space.
Outdoor fountains are more flexible. You can go bigger, use stronger pumps, and experiment with natural materials like large stones, cement pots, or layered designs.
Splashing is less of a problem, and you can also integrate plants, soil, and natural landscaping around it.
However, outdoor fountains face different challenges like algae growth, dust, and weather exposure, so maintenance becomes more important.
The key difference is balance. Indoors, you balance noise and space. Outdoors, you balance durability and natural look.
If you understand this difference before building, you avoid most beginner mistakes.
Common Mistakes Beginners Make And How to Avoid
Most people don’t fail at building a fountain because it is difficult, they fail because they ignore small details.
One common mistake is choosing a pump that is too strong or too weak.
A strong pump in a small container causes splashing, while a weak pump doesn’t create proper water flow. Another mistake is poor tubing placement.
If the tube is too long, bent, or blocked, water pressure drops and the fountain stops looking smooth.
Many beginners also forget about hiding the pump. When the pump and wires are visible, the fountain looks unfinished and messy.
Another issue is over-decorating. People often add too many stones, plants, or objects, which blocks water flow and ruins the natural look.
Water quality is also ignored. Dirty water leads to bad smell, algae buildup, and pump damage over time.
The best way to avoid these problems is to keep things simple. Start with a basic setup, test the water flow first, and then slowly improve the design.
A clean, balanced fountain always looks better than a complicated one that doesn’t work properly.
How Much It Costs to Build a Homemade Water Fountain?
The cost of a homemade water fountain depends completely on the materials you choose, but it is usually much cheaper than buying a ready-made decorative fountain.
At the lowest level, you can build a simple setup using a basic plastic container, a small pump, and natural stones.
This can be done on a very low budget, especially if you already have some materials at home.
A mid-range setup usually includes a better-quality ceramic pot or decorative container, a stronger pump, and added elements like lighting or better stones.
This gives a more aesthetic result without going into expensive territory.
On the higher end, people sometimes invest in solar pumps, premium stone designs, and decorative landscaping, especially for gardens or outdoor spaces.
The important thing to understand is that most of the cost goes into the pump and container.
Decorative elements are usually inexpensive or even free if you use natural items.
So the more creative you are with reuse and simple materials, the more you can control the budget.
How to Fix Common Water Fountain Problems?
Even a well-built fountain can run into small issues, but most of them are easy to fix. If water flow is weak or uneven, the first thing to check is the pump position.
It may not be fully submerged or may be blocked by debris. Another common issue is tubing length.
If the tube is too long or bent, it reduces pressure, so adjusting it often fixes the problem.
If water is splashing outside the container, the flow height is usually too high or the top structure is not stable.
Lowering the outlet or adjusting stone placement can solve this quickly. When the pump stops working completely, the issue is often dirt buildup or air trapped inside the system.
Cleaning the pump and restarting it usually brings it back to normal.
Sometimes the fountain looks dull or uneven, not because it is broken, but because the water path is not balanced.
In that case, small adjustments in stone angles or tube direction can improve the visual flow.
Most problems in homemade fountains are not technical failures, they are setup adjustments.
How to Maintain Your Water Fountain for Long-Term Use?
A water fountain doesn’t need heavy maintenance, but regular care is important if you want it to last.
The most basic step is changing the water every few days or at least once a week, depending on whether it is indoors or outdoors.
This prevents bad smell and algae buildup.
The pump also needs occasional cleaning. Over time, small dirt particles can block the pump and reduce water flow.
Cleaning it once every one to two weeks keeps it running smoothly. You should also check the water level regularly because if the pump runs dry, it can get damaged.
For outdoor fountains, extra care is needed because dust, leaves, and insects can enter the water.
Keeping the area clean and covering the fountain when not in use helps reduce maintenance work.
Simple habits like these keep the fountain working properly for a long time without major repairs.
Easy Upgrade Ideas to Make Your Fountain Look More Premium
Once your basic fountain is working, small upgrades can completely change how it looks. Adding LED lights is one of the easiest improvements.
Soft lighting under water or behind stones creates a calm, premium effect, especially at night. Another upgrade is using plants around the fountain.
Greenery makes the setup feel more natural and visually rich.
You can also upgrade the water flow design by changing how water falls.
Instead of a simple stream, you can create a layered waterfall or a bamboo-style flow for a more aesthetic look.
Some people also switch to solar-powered pumps for outdoor setups, which makes the fountain more eco-friendly and easier to run.
The key idea is not to overcomplicate it. Small changes done well make a bigger impact than adding too many elements at once.
Conclusion
A homemade water fountain is not about technical skill, it’s about understanding a simple system and arranging it in a smart way.
Once you know how the pump, container, and water flow work together, the process becomes straightforward.
The real difference between a basic fountain and a beautiful one is not money, but attention to detail.
If you keep the design balanced, avoid common mistakes, and focus on clean water flow, you can build something that not only works properly but also improves the look and feel of your space.
Start simple, test as you go, and improve step by step. That’s how you end up with a fountain that actually feels worth building.

Hi, my name is Zeeshan, and I am the founder of The Crafts Geek. I have been passionate about DIY projects, home organization, and creative problem-solving for years. Over time, I realized that simple storage solutions and practical DIY ideas can make a huge difference in how a home looks and functions.