
Let’s be honest—your garage probably didn’t get messy overnight.
It slowly turned into a place where everything goes but nothing comes out. Old tools, broken items, boxes you haven’t opened in years… and now it feels so full that you don’t even know where to start.
You might have tried cleaning it before. Maybe you moved a few things around, added a shelf, or told yourself you’d “deal with it later.” But somehow, it always goes back to the same mess.
The real problem isn’t just clutter, it’s not having a clear system. That’s exactly what this guide will fix.
Instead of random tips, you’ll learn a simple, step-by-step way to organize your garage without feeling overwhelmed.
By the end, you won’t just have a clean space, you’ll have a system that actually stays organized.
Let’s get started.
Why Your Garage Feels So Messy Right Now?
Your garage didn’t suddenly become messy, it built up over time without you noticing. Every time you didn’t have a clear place to put something, it ended up in the garage.
Over weeks and months, those small decisions turned into a big problem. Now the space feels crowded, unorganized, and stressful to even look at.
The main issue isn’t just clutter, it’s the lack of a system. Most garages don’t have a clear structure, so items get placed wherever there’s space.
Tools mix with sports equipment, old boxes sit unopened for years, and you end up buying things again because you can’t find what you already have.
There’s also a mental barrier. When your garage looks overwhelming, you avoid dealing with it. That delay makes the problem worse. The more clutter you see, the harder it feels to start.
The truth is, your garage isn’t messy because you’re careless, it’s messy because it was never set up to stay organized. Once you fix that, everything changes.
Before You Start: Make a Simple Plan
Before you begin, take a moment to plan. This step may seem small, but it can save you from getting tired halfway through and giving up.
A garage cleanout is not difficult, but it can feel overwhelming without a clear approach.
Start by deciding how much time you can give. If your garage is heavily cluttered, don’t expect to finish in a couple of hours.
Plan for a full day or split the work into smaller sessions. Setting realistic expectations helps you stay motivated.
Next, gather basic supplies like trash bags, boxes for sorting, cleaning tools, and markers for labeling. These simple items will make the process smoother.
Now decide your method. The best approach is to clear everything out so you can see the full picture.
Also, set one important rule: you won’t keep everything. You’ll need to make decisions, and that’s part of the process.
Think of this as a reset, not just a cleanup. You’re building a system that will make your life easier every day.
Step 1: Take Everything Out
The first step is to completely empty your garage. This might sound like a lot of work, but it’s necessary if you want real results.
Trying to organize around existing clutter only hides the problem instead of fixing it.
As you take items out, place them in open space like your driveway or yard. Start grouping similar items together right away.
For example, keep tools in one area, sports equipment in another, and car-related items in a separate pile. This will save time later and give you a better idea of what you own.
Once the garage is empty, take advantage of the space to clean it properly. Sweep the floor, remove dust, and check for any damage like cracks or leaks.
A clean space feels fresh and motivates you to keep going.
Seeing your garage completely empty also gives you a clear understanding of how much space you actually have, which is very helpful for the next steps.
Step 2: Get Rid of Things
This is where the real transformation begins. Go through each item carefully and decide whether it deserves to stay.
Ask yourself simple questions: Have I used this in the last year? Is it broken or outdated? Do I have duplicates?
Create four clear groups: keep, donate, sell, and throw away. Be honest with your decisions. Keeping things “just in case” is one of the biggest reasons clutter builds up again.
If you find items that are broken but fixable, give yourself a deadline. If you don’t repair them within that time, they should go. This prevents things from sitting unused for years.
You may feel attached to some items, and that’s normal. But remember, the goal is to create a space that works for you now, not to store things you no longer need.
The less you keep, the easier it becomes to organize and maintain your garage in the long run.
Step 3: Group Similar Items
Once you’ve reduced the clutter, the next step is to organize what’s left into clear groups. This step is simple but very powerful. When similar items are kept together, it becomes much easier to find things and keep the space organized.
Start by creating categories that match your daily life. For example, you might have groups for tools, gardening supplies, car maintenance items, sports equipment, and seasonal decorations. Keep your categories practical and easy to understand.
As you group items, pay attention to how much space each category needs. Some groups may be small, while others take up more room. This will help you plan your layout in the next step.
Grouping items also helps you spot duplicates or unnecessary items you may have missed earlier. It creates clarity and gives you control over what you own.
Step 4: Create Zones in Your Garage
Now it’s time to turn your groups into zones. A zone is simply a dedicated area for a specific type of item. This is what turns your garage from cluttered storage into a functional space.
Assign each category its own space. For example, tools can go in one area, gardening supplies in another, and sports equipment in a different section.
Think about how often you use each category. Items you use regularly should be easy to reach, while rarely used items can be stored higher up or in less convenient spots.
Also consider how you move around your garage. Place things where they make the most sense. For example, keep cleaning tools near the entrance or car-related items close to where you park.
A well-planned zone system makes your garage easier to use and maintain. You always know where things belong, which reduces clutter in the future.
Step 5: Set Up Storage for Your Budget
Now that you have zones, you can choose the right storage solutions. You don’t need expensive systems to create an organized garage. Simple and practical options often work best.
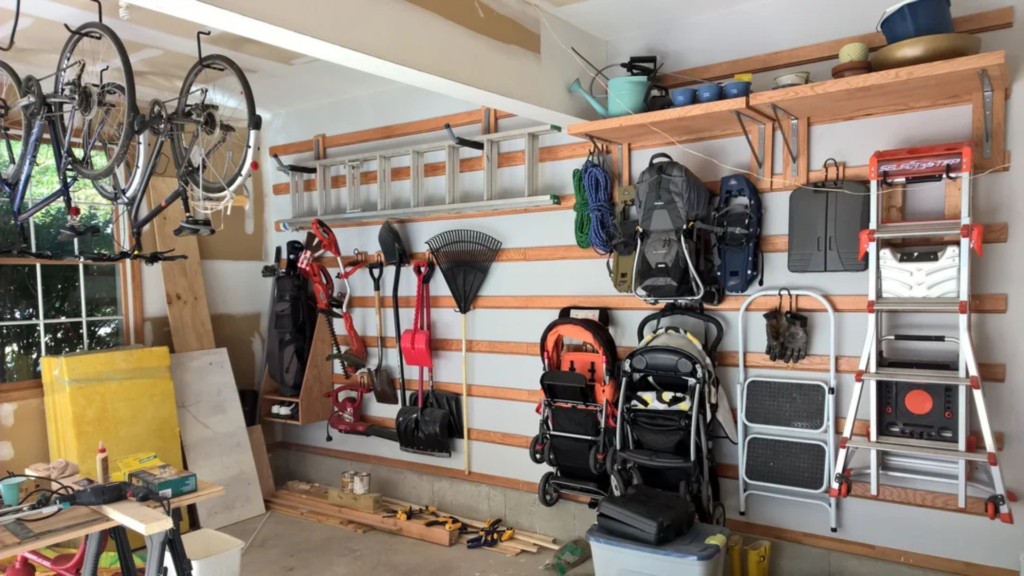
Use shelves to store boxes and larger items. Install hooks or wall mounts for tools, bikes, and equipment. Use cabinets for items like chemicals that need to be stored safely. Clear bins are helpful for smaller items because you can easily see what’s inside.
Try to use vertical space as much as possible. Walls are often underused, but they can hold a lot of items and keep the floor clear.
If you’re on a budget, reuse containers you already have or build simple shelves. If you want a more polished look, you can invest in garage storage systems.
The goal is simple: everything should have a proper place, and it should be easy to access.
Step 6: Put Everything Back
Now bring everything back into your garage, but this time with a clear plan. Place each item in its assigned zone and storage area. Keep frequently used items within easy reach so you don’t have to dig through things every time.
Take your time with this step. Think about how you’ll use each item and whether its location makes sense. If something feels hard to reach or inconvenient, adjust it now.
Using labels can make a big difference, especially if multiple people use the garage. Labels help everyone follow the system and keep things organized.
When everything is in place, your garage should feel open, clean, and easy to use. This is where all your effort starts to pay off.
How to Keep Your Garage Clean After Organizing It
Organizing your garage is only half the job. Keeping it clean is what really matters. The good news is that once you have a system, maintenance becomes much easier.
Make it a habit to put things back after using them. This small action prevents clutter from building up again. You can also spend a few minutes each week doing a quick reset, making sure everything is in its place.
A monthly check can also help. Look for items you no longer need and adjust your system if something isn’t working.
Consistency is more important than perfection. Small efforts over time will keep your garage organized without needing another big cleanup.
Common Mistakes That Make Garages Messy Again
Many people unknowingly make mistakes that bring back the clutter. One of the most common mistakes is buying storage before decluttering. This often leads to storing things you don’t actually need.
Another mistake is keeping too many “just in case” items. These items take up space and rarely get used. Not labeling storage areas can also create confusion, especially if others use the garage.
Ignoring vertical space is another big issue. When everything stays on the floor, the garage quickly feels crowded again.
Avoiding these mistakes will help you maintain your organized space for a long time.
Simple Safety Tips Most People Ignore
Garages often contain items that can be dangerous if not stored properly. Things like paint, fuel, and chemicals should always be handled with care.
Make sure these items are sealed tightly and stored in a safe place away from heat. If you have children, keep them out of reach. Proper ventilation is also important to avoid harmful fumes.
Taking a few extra steps for safety not only protects your space but also gives you peace of mind.
Conclusion
You don’t need a perfect garage, you need one that works for you. After following these steps, your space should feel more open, organized, and easy to use.
The key is to stick to the system you’ve created. Keep things simple, stay consistent, and make small efforts regularly. Over time, your garage will stay clean without much effort.
Now, instead of avoiding your garage, you can actually use it the way it was meant to be used.

Hi, my name is Zeeshan, and I am the founder of The Crafts Geek. I have been passionate about DIY projects, home organization, and creative problem-solving for years. Over time, I realized that simple storage solutions and practical DIY ideas can make a huge difference in how a home looks and functions.