Halloween crafts are supposed to be fun, but some “easy” projects leave you hunting for supplies and cleaning up a huge mess.
You want something quick, simple, and actually doable, especially when kids are waiting to get started.
The good news is, you don’t need expensive materials or complicated steps to make something spooky and fun.
Here, you’ll find easy Halloween crafts you can make at home with simple supplies and little preparation.
Easy Halloween Crafts
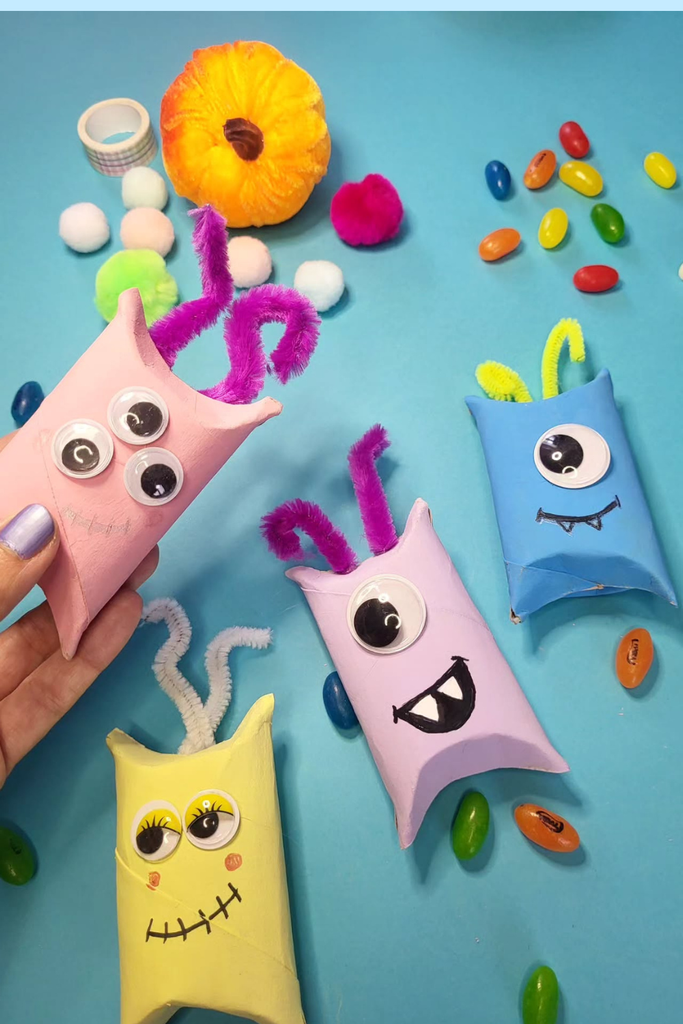
Roll Monsters
Turn empty toilet paper rolls into playful monsters with paint, googly eyes, and pipe cleaners for a quick Halloween craft at home.
Give each monster a different face, then place them across a party table, kids’ craft corner, or classroom display for instant character.
Let children choose bright colors and draw silly mouths; add curled pipe cleaners as antennae if you want them to look extra playful.
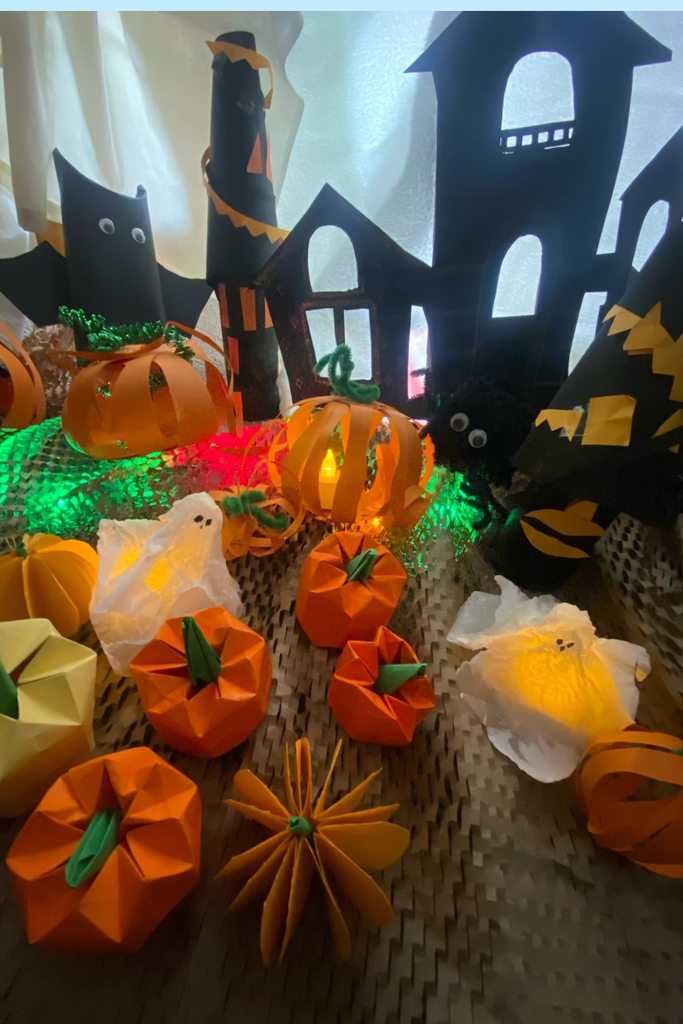
Spooky Village
Turn a small table into a Halloween scene by grouping handmade pumpkins, ghosts, haunted houses, and witch hats together neatly.
Use folded paper, cardboard, tissue, and orange strips to build the pieces, then add battery lights behind pumpkins for warmth.
Keep the arrangement low on a console or dining table, where the black-and-orange palette creates a festive focal point without overcrowding.
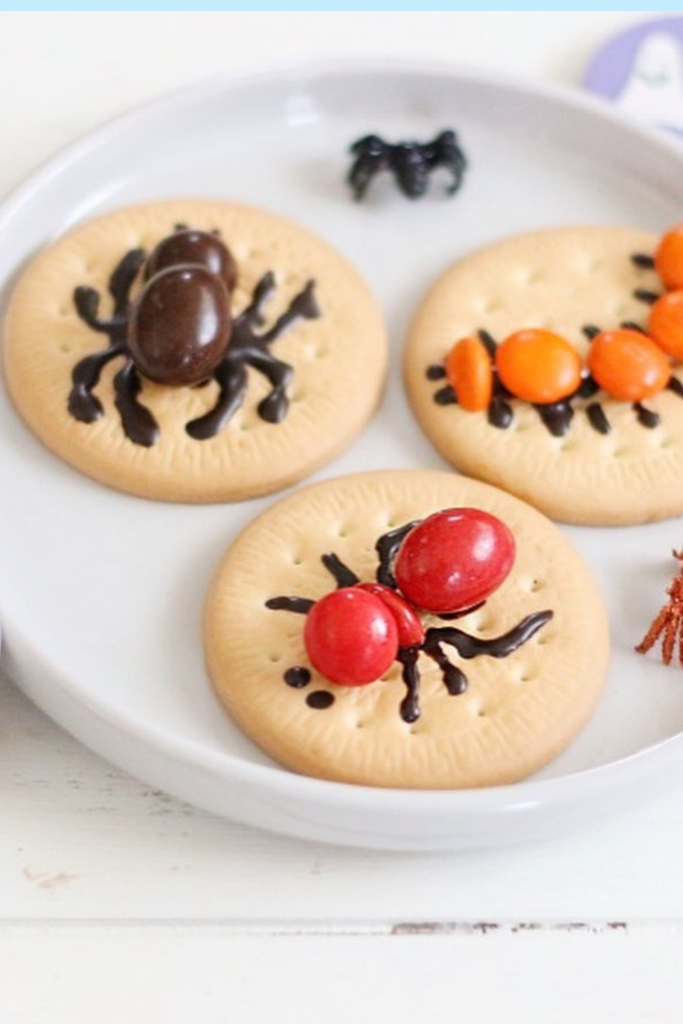
Spider Bites
Turn ordinary round crackers into playful spider snacks when you need a Halloween treat that takes almost no preparation.
Use chocolate spread for the spider legs, then add grapes or colorful candies as bodies and arrange several on one plate.
Serve these at a kids’ Halloween party or classroom snack table, keeping the designs simple enough for children to help decorate.
Haunted Wreath
Give your front door a haunted makeover by combining a dark wreath with faux flowers, miniature pumpkins, and a spooky skull centerpiece.
Wrap a basic wreath with black fabric or mesh, then attach seasonal flowers and small decorations around the edges for layered texture.
For stronger impact, hang tattered fabric through the center and place the wreath on your entry door where guests notice it immediately.
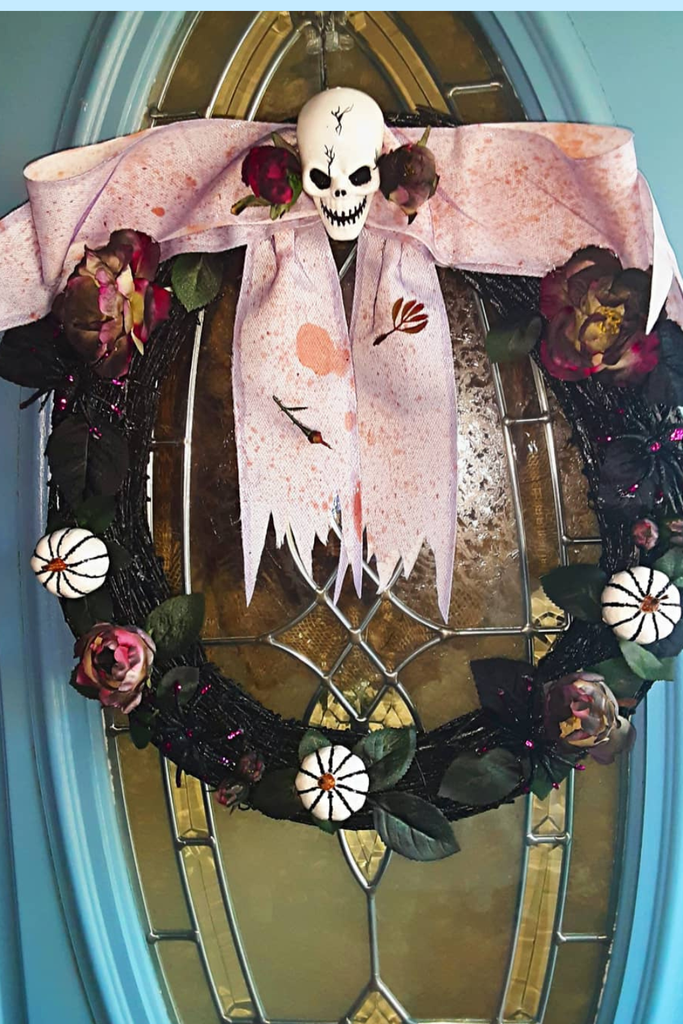
Plate Spider
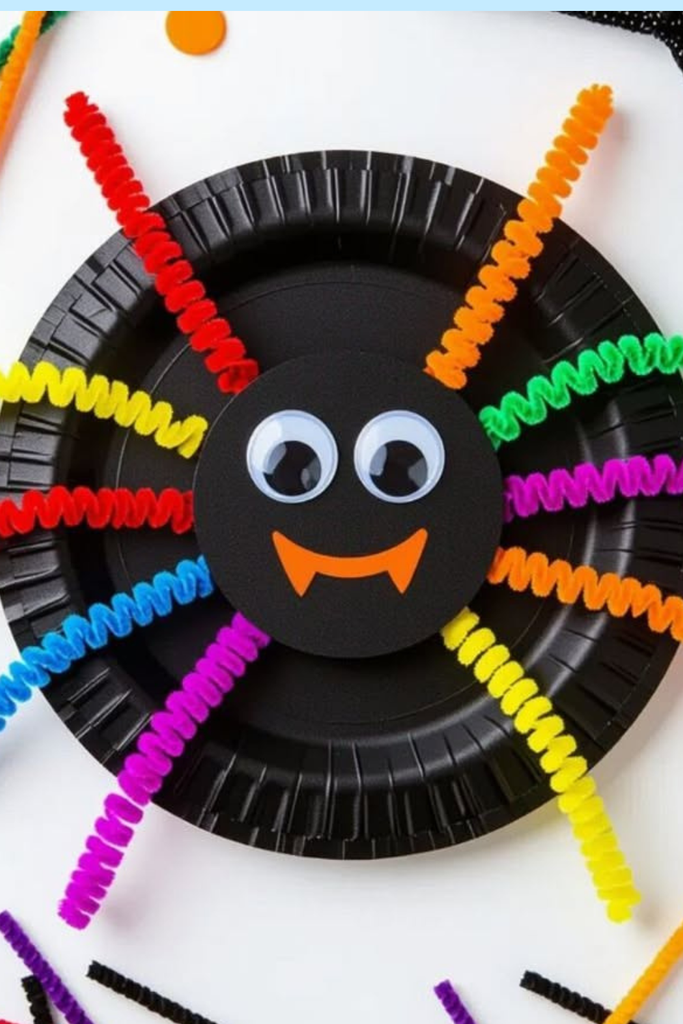
A black paper plate becomes a cheerful spider when you add googly eyes, a simple smile, and colorful pipe-cleaner legs.
Bend each pipe cleaner into loose curls before attaching them, because the springy shape gives the spider a playful Halloween look.
Hang several together as a classroom display, or let children make different faces and colors for an easy group craft activity.
Pumpkin Chain
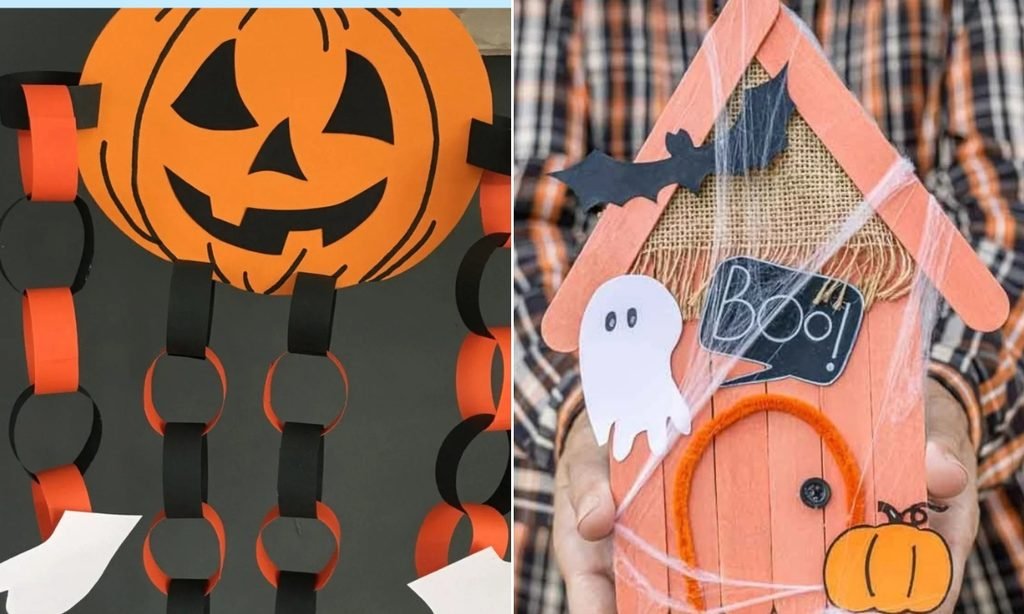
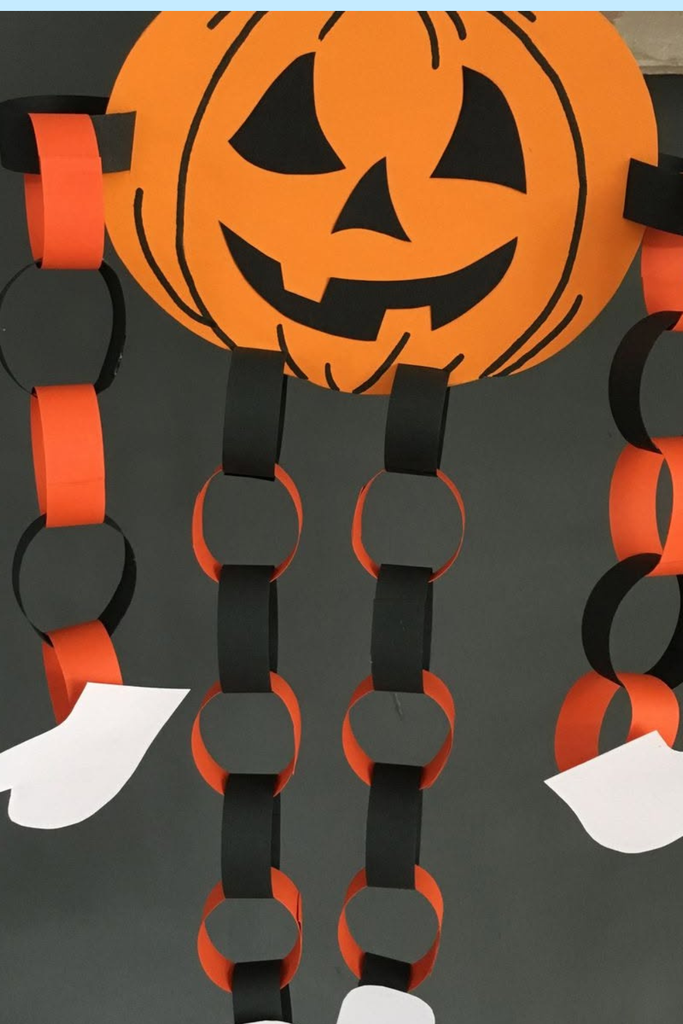
Make a large pumpkin centerpiece the starting point, then let orange and black paper chains hang below it like playful Halloween legs.
Cut equal paper strips, loop them together, and alternate orange and black colors to create a bold hanging decoration.
Add white paper hands or feet at the ends, then hang it across a wall, doorway, or classroom display.
Clay Pumpkins
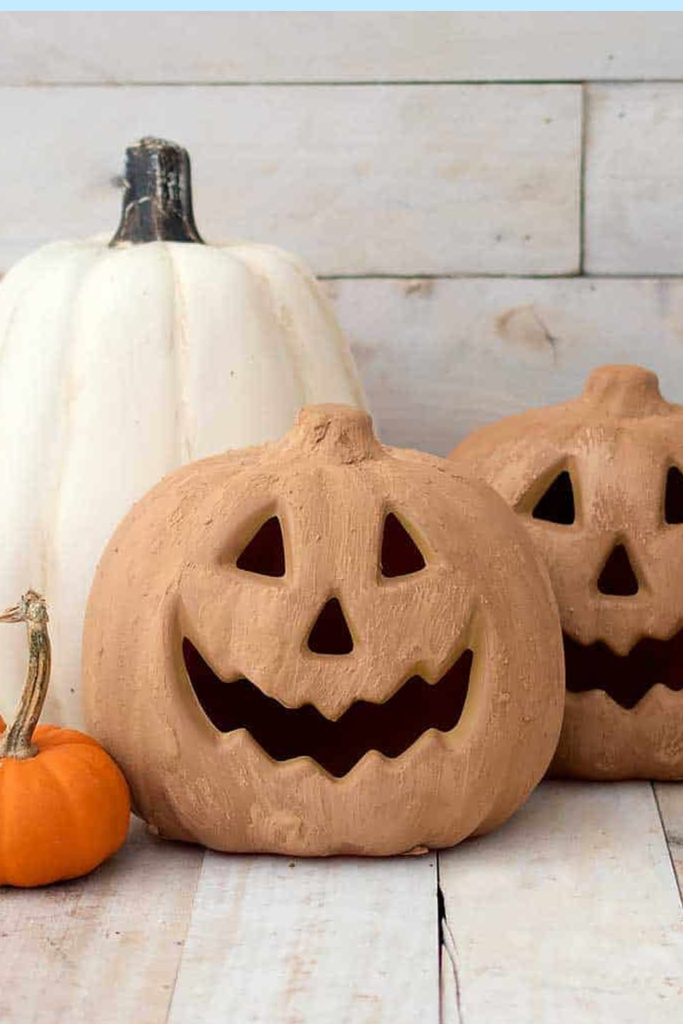
For a softer Halloween look, shape air-dry clay pumpkins and give each one a different friendly jack-o’-lantern face.
Keep the pumpkins in natural clay shades, then place them together with mini orange pumpkins for a simple seasonal arrangement.
Display this group on a mantel, entryway table, or shelf, where the handmade texture adds Halloween character without overwhelming your décor.
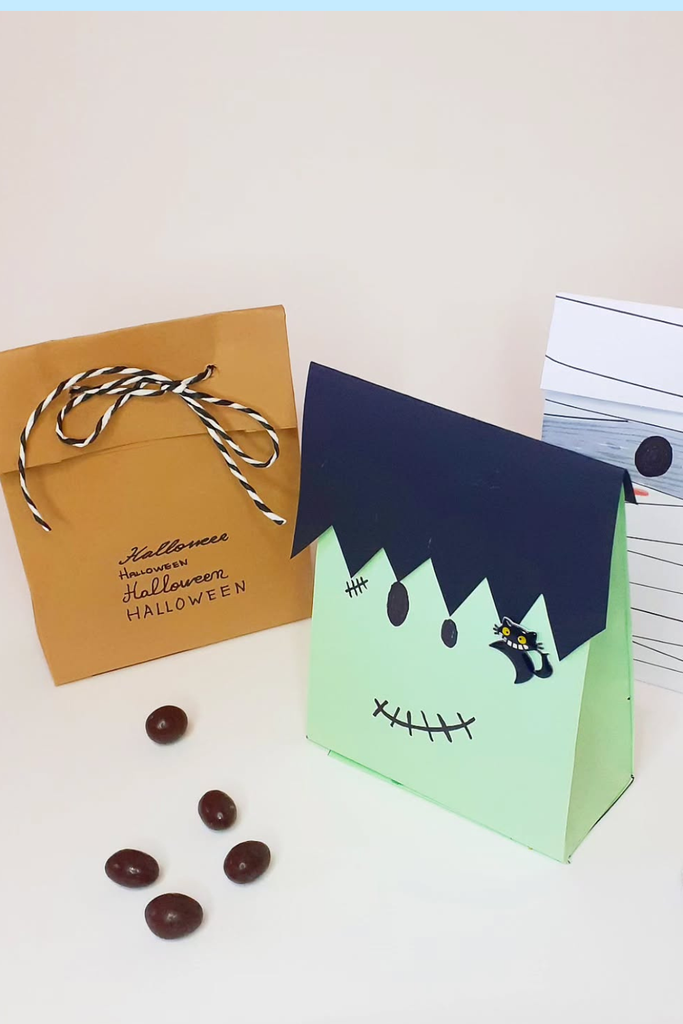
Monster Pockets
Save small paper bags for Halloween and turn them into monster treat pockets that children can decorate with their favorite spooky characters.
Cut jagged hair from colored paper, then add drawn faces, eyes, scars, or small stickers to make each bag completely different.
Fill them with wrapped treats and use these handmade pockets for classroom favors, party activities, or simple Halloween gift bags.
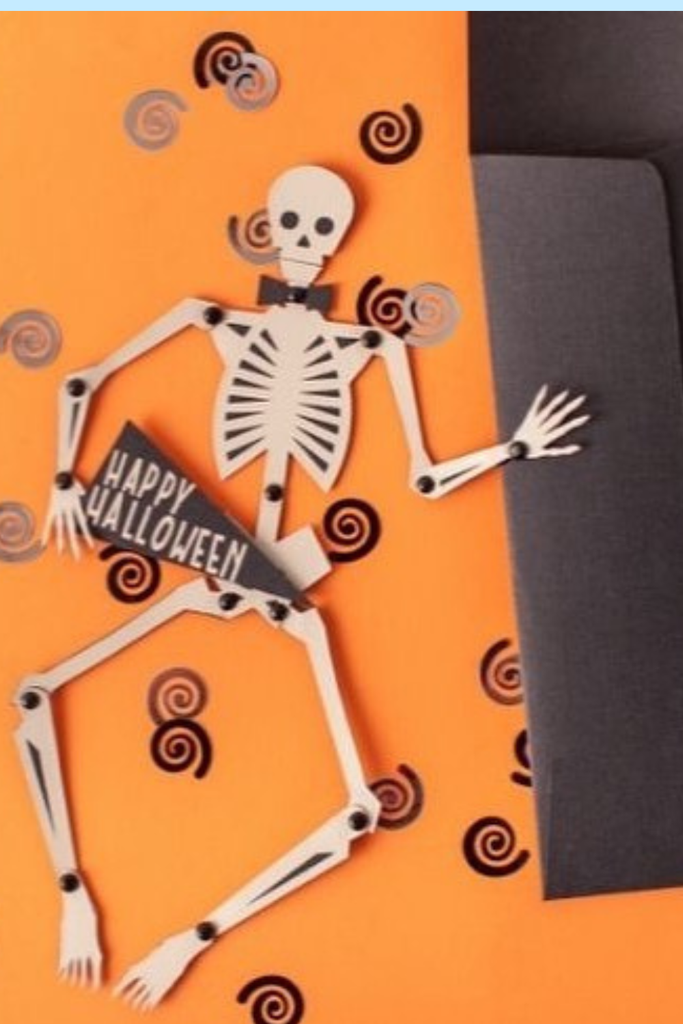
Skeleton Scene
Give a sheet of orange paper a Halloween makeover by adding a movable paper skeleton surrounded with simple spiral shapes.
Cut the skeleton from white cardstock, connect its bones with small paper fasteners, and position the limbs into different playful poses.
Use this craft as a classroom wall display, party backdrop, or interactive activity where children can rearrange the skeleton’s pose.
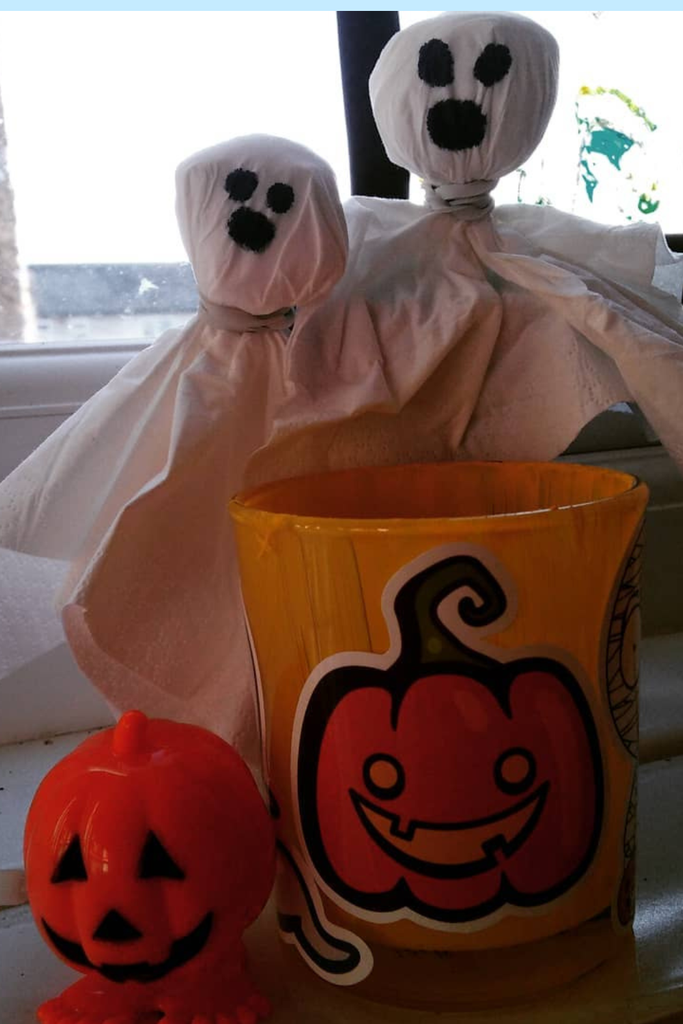
Window Ghosts
Give old tissue paper and recycled containers a second life by turning them into friendly ghosts for a quick Halloween display.
Wrap the containers with white tissue, tie the tops securely, then draw simple black faces to create different ghost expressions.
Place them beside pumpkins on a windowsill, shelf, or entry table, where daylight makes the lightweight ghosts stand out beautifully.
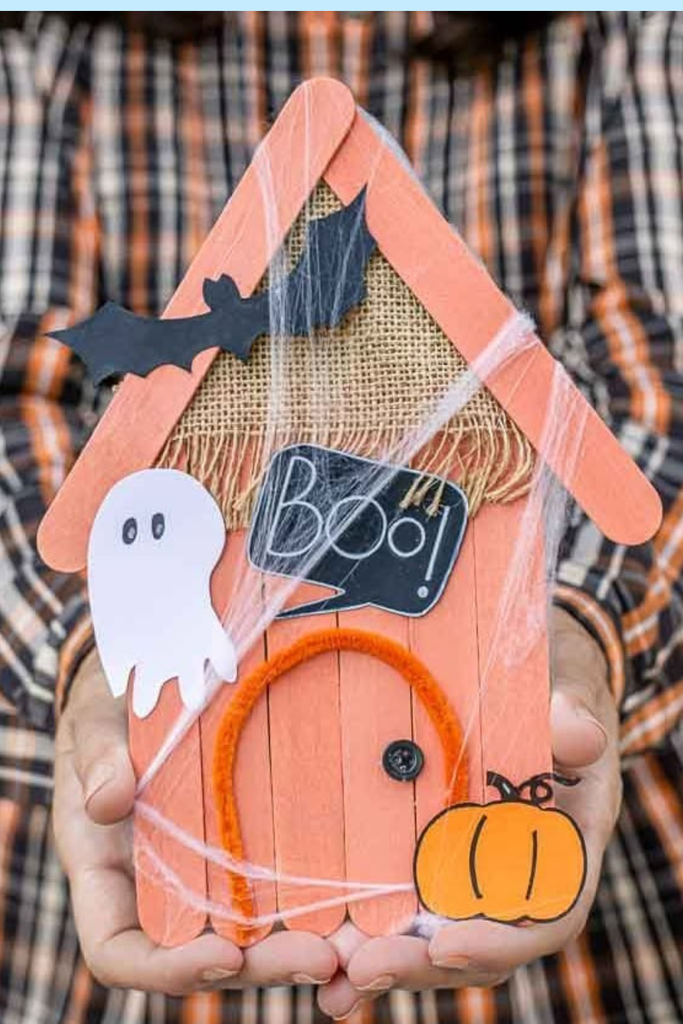
Haunted House
A few popsicle sticks can become a tiny haunted house, giving kids a simple base they can decorate without complicated cutting.
Build the roof and walls first, then add burlap, a paper ghost, bat, pumpkin, and spiderweb details for Halloween character.
Keep it small enough for a shelf or tabletop display, and let children personalize the house with their own spooky touches.
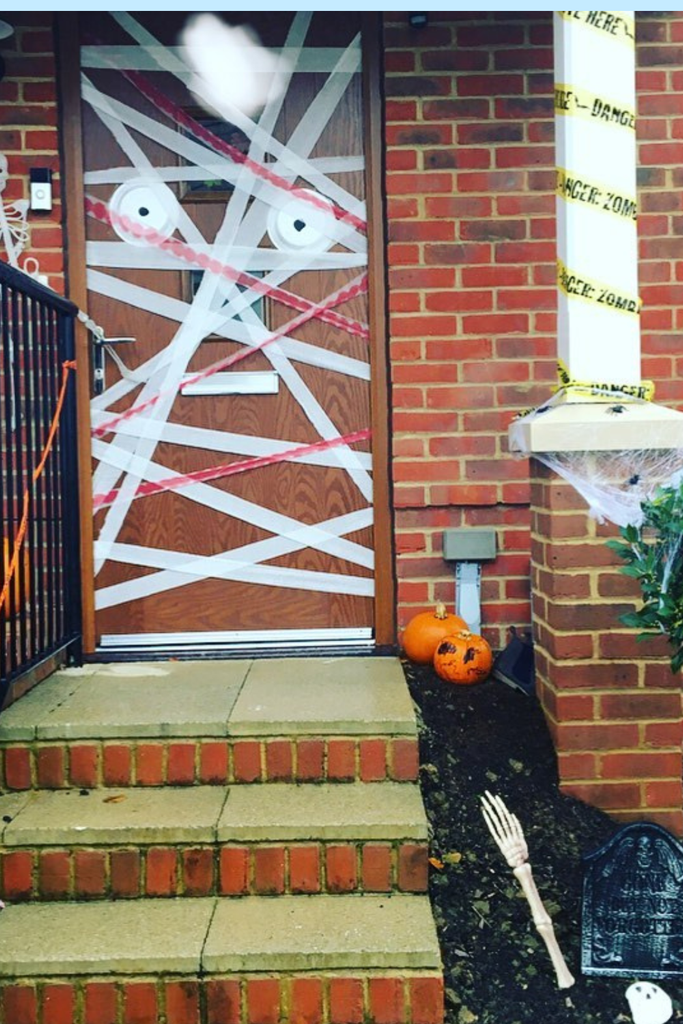
Mummy Door
Turn your front door into a giant mummy by wrapping it with white paper strips, leaving enough space around handles.
Add simple paper eyes between the strips, then place small pumpkins and skeleton decorations nearby to build the Halloween scene.
This works especially well on porch entrances, because the wrapped door becomes the main attraction before visitors even step inside.
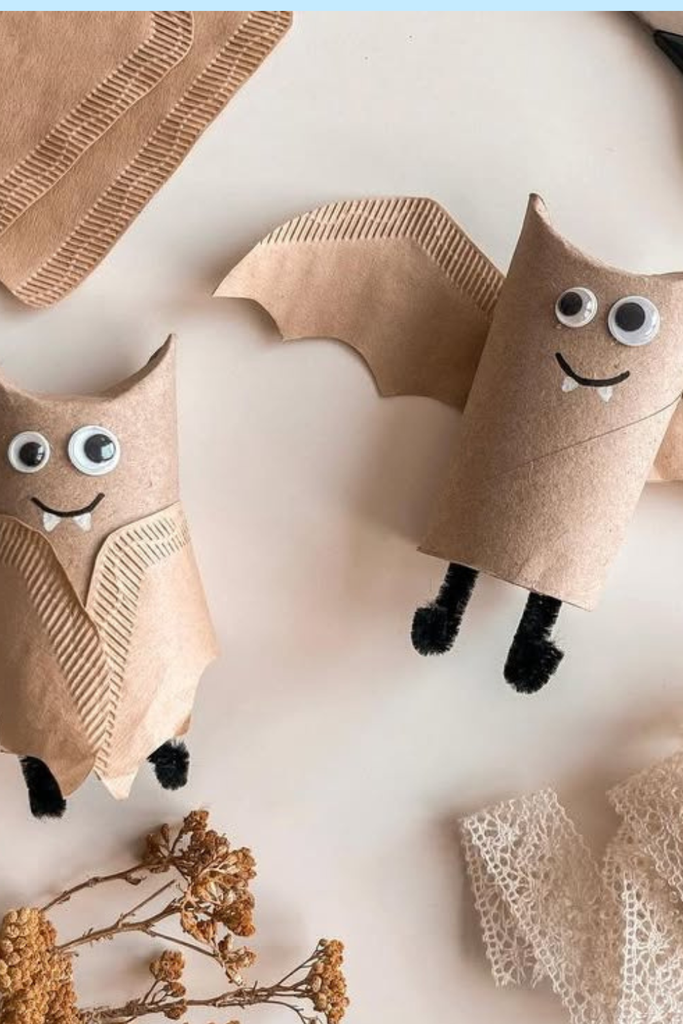
Tube Bats
Give empty toilet paper rolls a Halloween twist by shaping the ends into bat ears and adding simple facial details.
Wrap the rolls with kraft paper, attach googly eyes, then use black pipe cleaners for tiny feet and cut wings separately.
Make several together and place them on a shelf, craft table, or classroom display for an easy recycled-material Halloween project.
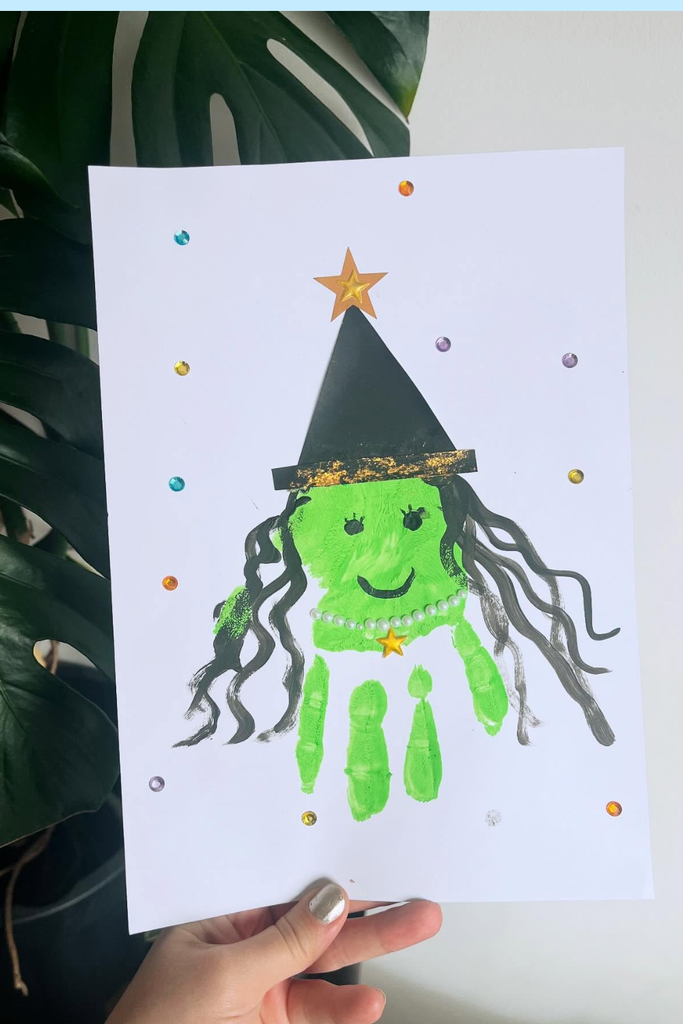
Witch Print
A simple handprint witch gives younger kids an easy Halloween project while letting them turn their painted hands into a recognizable character.
Paint the palm green, press it onto cardstock, then add paper hair, a pointed hat, facial details, and small decorations.
Frame the finished artwork for a classroom wall or refrigerator display, making it a fun keepsake that children can create with little help.
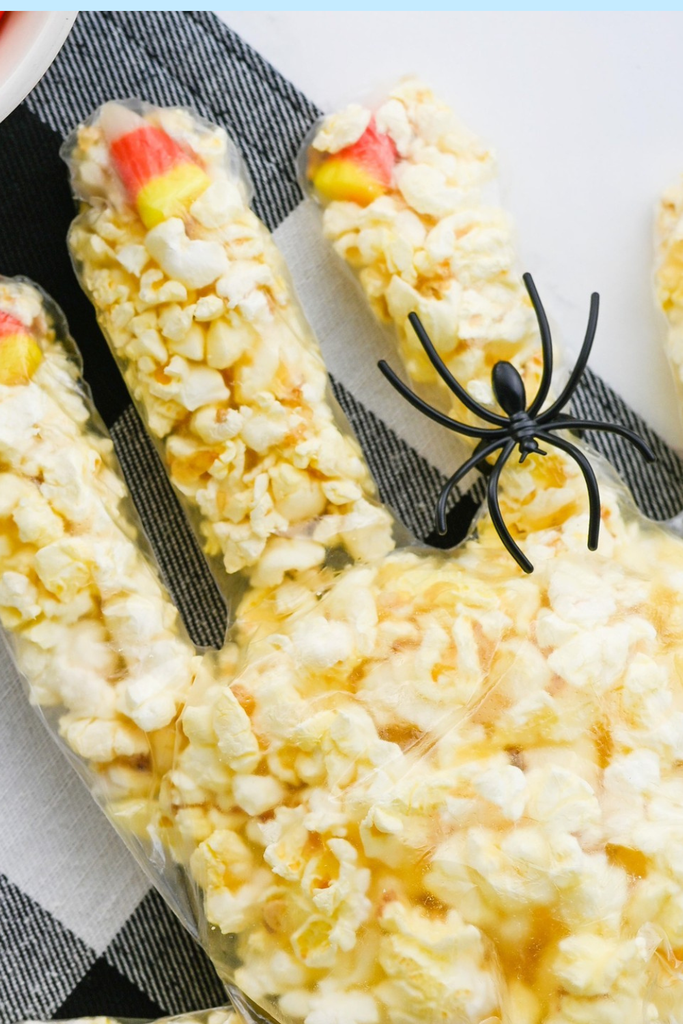
Popcorn Hand
Turn popcorn into a playful Halloween snack by shaping it into a hand and adding candy corn for colorful fingertip details.
A clear food-safe glove keeps everything together, while a small plastic spider adds a simple spooky touch without complicated decorating.
Prepare several for a Halloween party table, especially when you want a quick edible centerpiece that children can enjoy afterward.
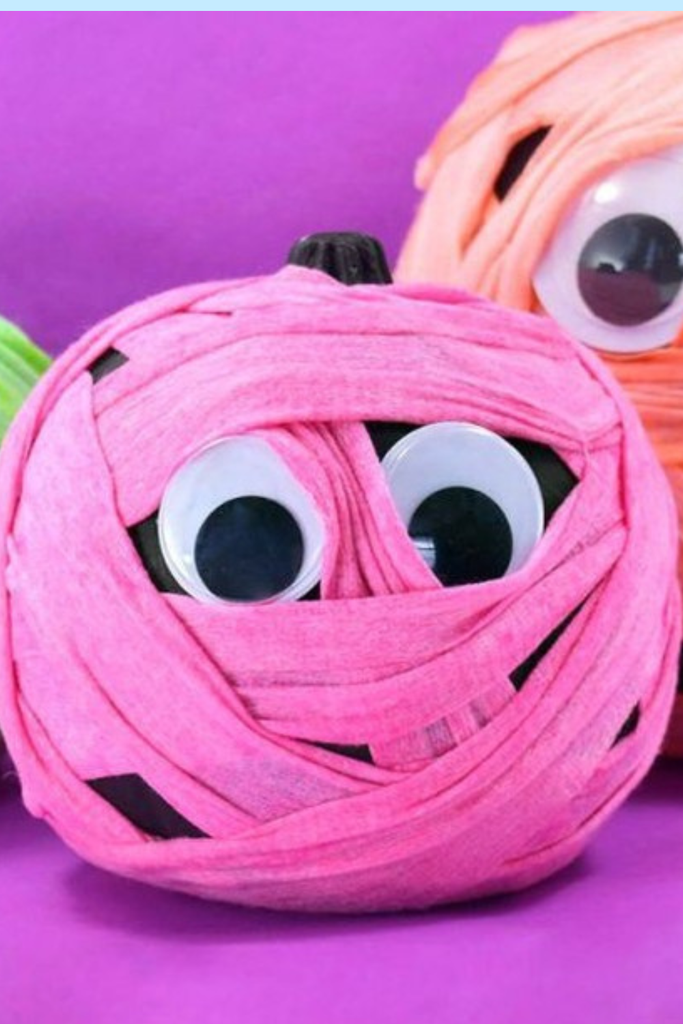
Yarn Mummies
Wrap foam or lightweight balls with colorful yarn to create cute mummies that feel playful rather than overly spooky for children.
Leave a small opening for the eyes, then glue on googly eyes and add a tiny black mouth between the layers.
Arrange several together on a Halloween shelf or party table, mixing colors to create a cheerful group with different expressions.
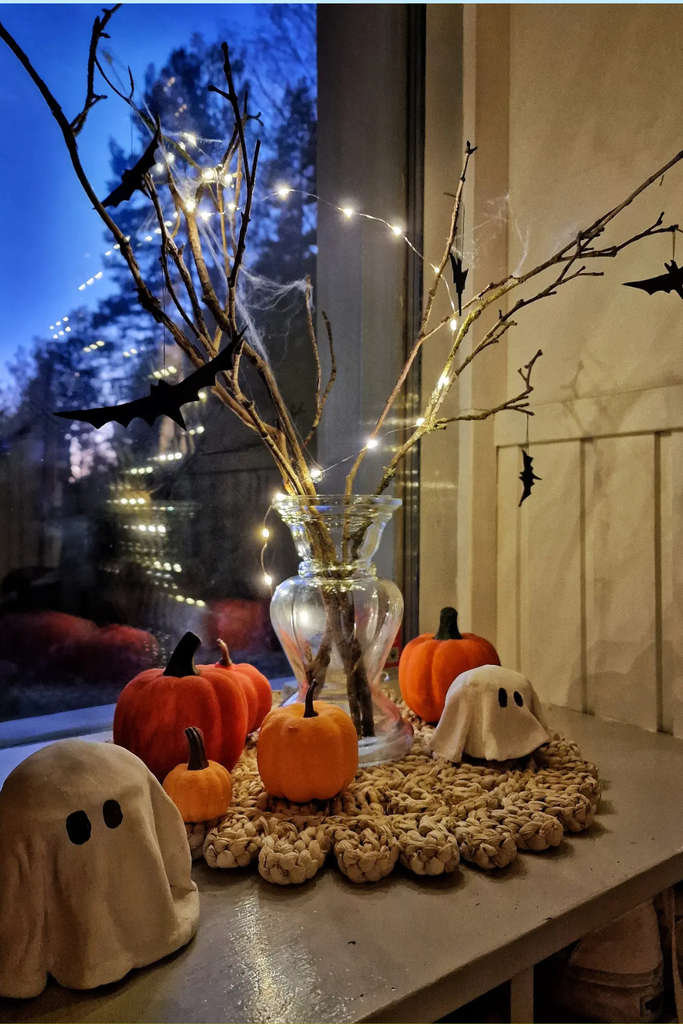
Bat Branches
Bring a little woodland Halloween charm indoors by arranging bare branches in a glass vase and adding small paper bats.
Wrap tiny string lights around the branches, then scatter miniature pumpkins and simple ghost figures along the windowsill.
This setup works beautifully beside a living room window or mantel, especially when you want soft lighting with understated Halloween details.
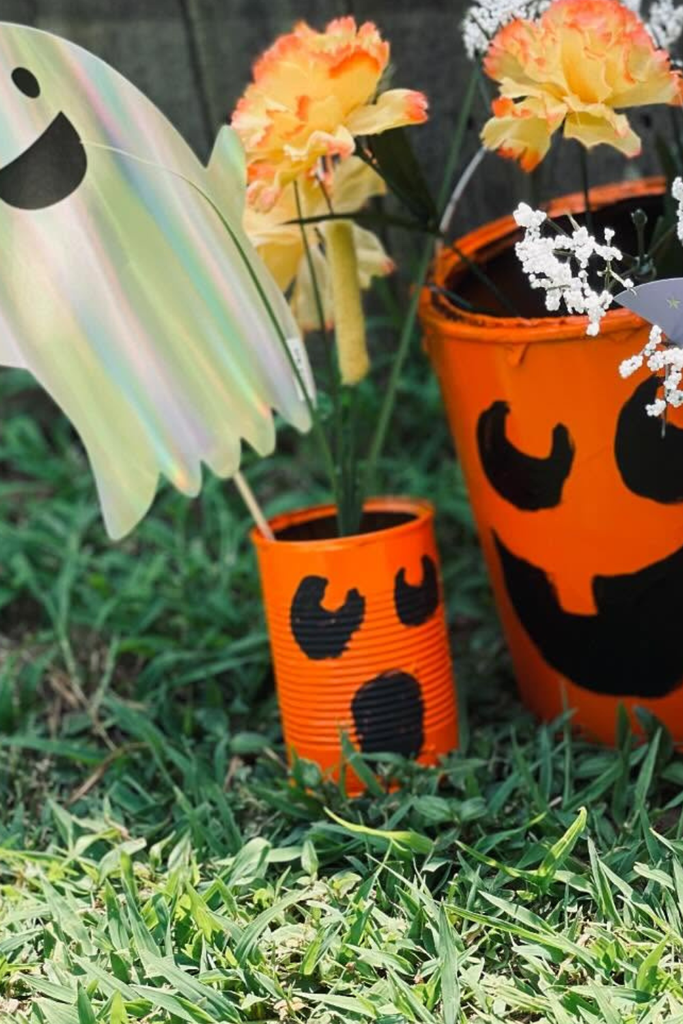
Can Planters
Give empty cans a Halloween makeover by painting them orange and turning them into cheerful planters for seasonal flowers outdoors.
Add simple black faces with paint, then use paper ghosts or bats on sticks to make each planter feel festive.
Arrange the finished cans around a porch, garden path, or balcony, where bright flowers and spooky characters create an easy Halloween display.
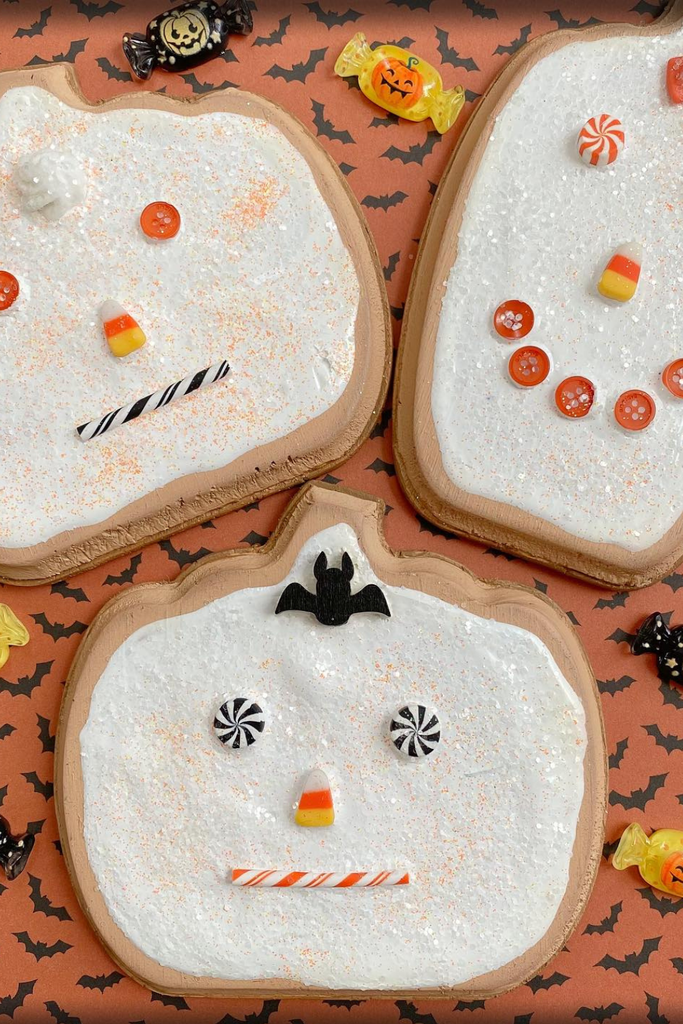
Candy Ghosts
Turn wooden pumpkin shapes into playful Halloween ghosts by covering the surface with a textured white finish. Keep the edges natural so the pumpkin outline still frames the craft.
Add candy corn, buttons, peppermint pieces, or small bat cutouts to create simple faces and details.
Use lightweight decorations so they stay attached easily. This idea works well as a Halloween centerpiece, shelf decoration, or party display, and you can change each face for variety.
Wrapped Jars
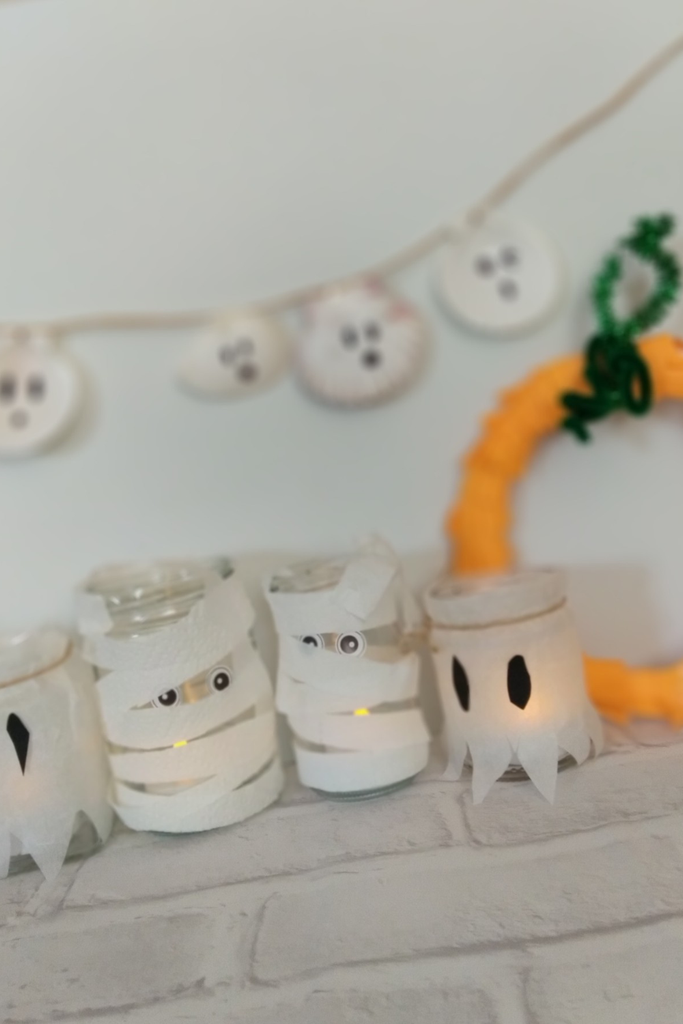
Turn small glass jars into quick Halloween decorations by wrapping them with white gauze, tissue, or thin fabric.
For ghost versions, cut simple eyes and mouths from black paper and attach them to the front. For mummy jars, layer the material loosely so the eyes peek through.
Add a battery-powered tea light inside if the jars are suitable for it. Group several together to create an easy Halloween display.
Spider Webs
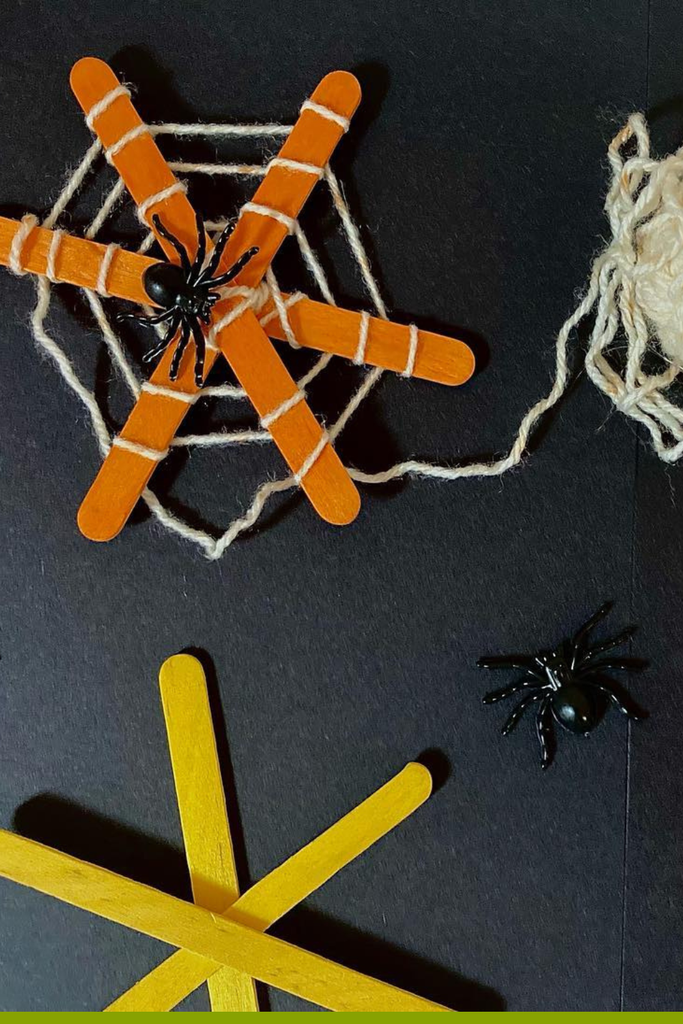
Create quick spider web decorations with craft sticks and yarn. Paint the sticks orange or another Halloween color, then overlap them to form a simple web shape.
Wrap white or light-colored yarn around the sticks, moving from one section to the next until the web looks full.
Add a small plastic spider in the center for the Halloween effect. You can also wrap yarn around a small ball to make a matching spider web prop.
Paper Plate Ghosts
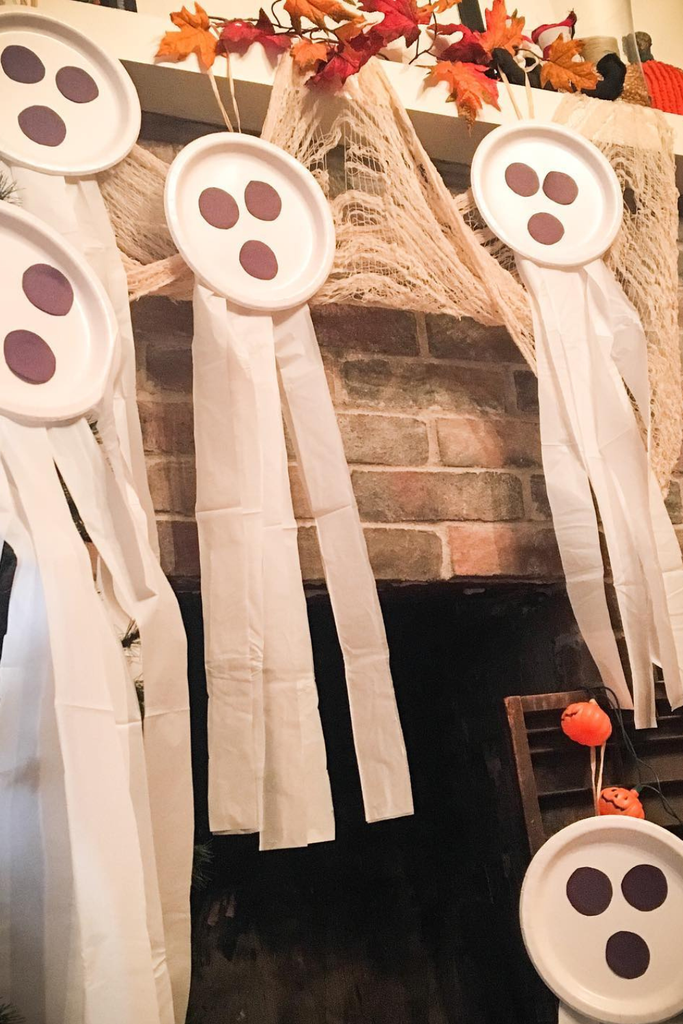
Make these paper plate ghosts with supplies you probably already have at home. Use a white plate for each ghost, then add simple black paper eyes and a mouth.
Cut long strips of white paper or tissue and attach them underneath the plate so they hang like a ghostly body.
Add different faces to each one, then hang them around a doorway, wall, or fireplace for an easy Halloween decoration.
Witch Hats
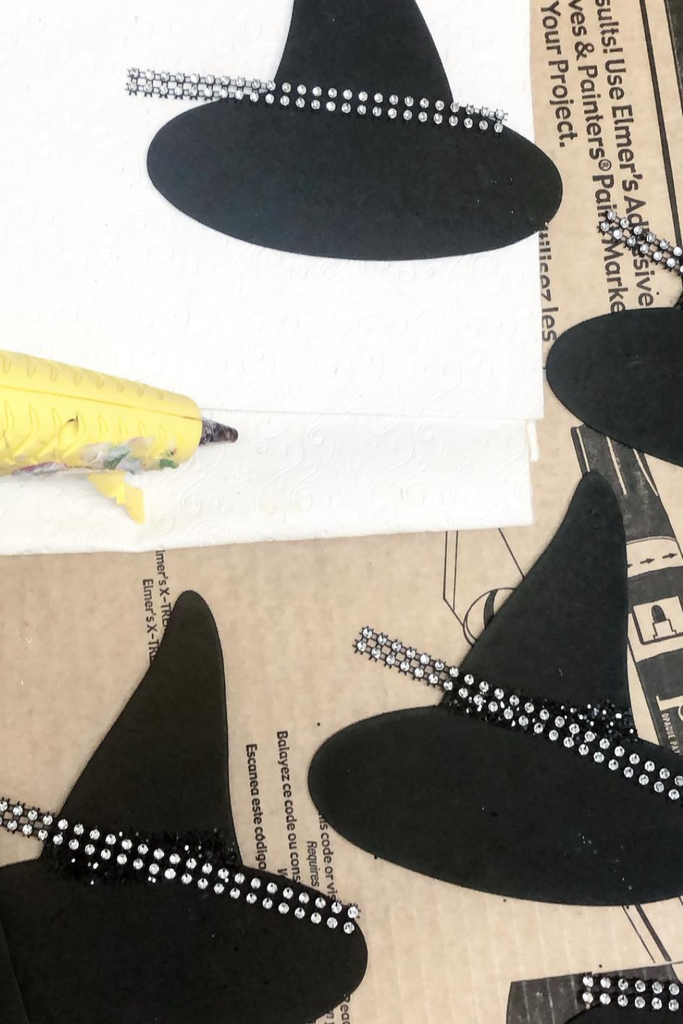
Make these mini witch hats from black cardstock or craft foam for a simple Halloween project. Cut a cone and a wide brim, then secure them together with glue.
Add a rhinestone trim, ribbon, or colored paper band around the base to give each hat its own style.
You can make several sizes for decorating pumpkins, party tables, gift bags, or a Halloween display. They are simple enough for kids to personalize with their favorite decorations.
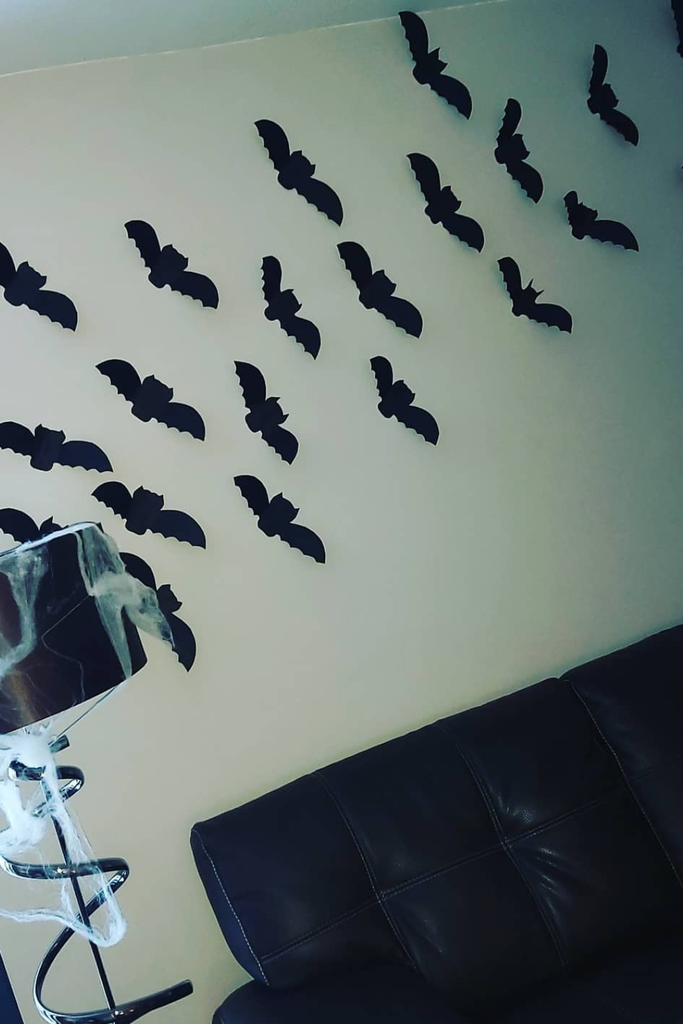
Bat Wall
Create a dramatic Halloween wall using black paper bats in different sizes. Cut simple bat silhouettes, then attach them to the wall so they appear to fly upward in a loose group.
Start with a few larger bats near the bottom and gradually use smaller ones as the arrangement moves higher.
This keeps the display looking natural. If you want an easy temporary decoration, use removable adhesive instead of permanent tape.
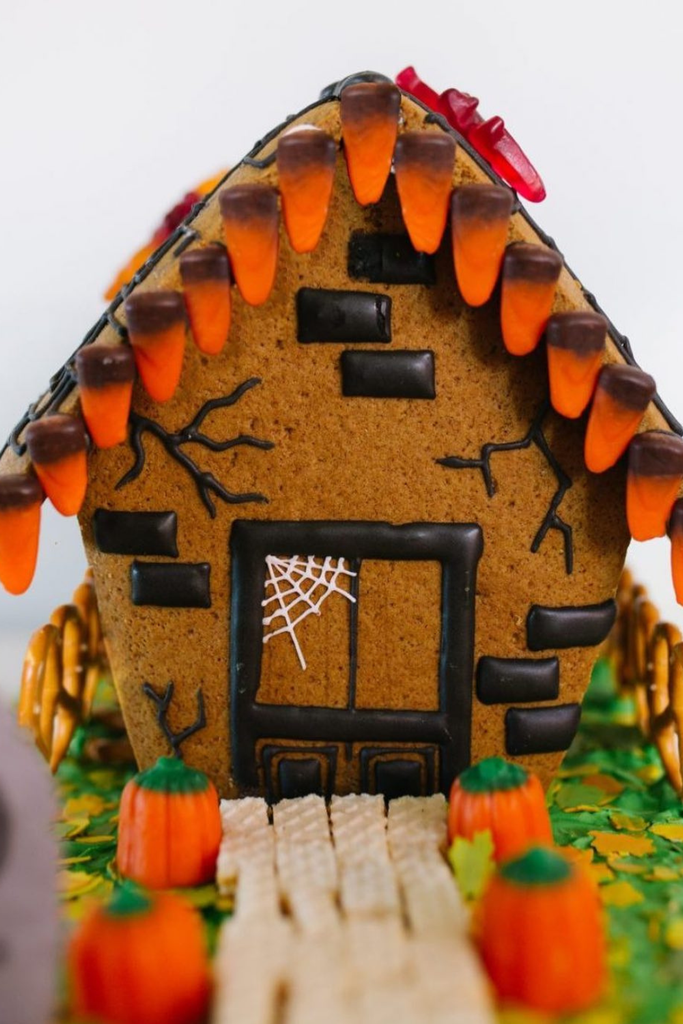
Spooky Gingerbread
Turn a simple gingerbread house into a Halloween centerpiece by decorating it with candy corn, black icing, and tiny pumpkin candies.
Start with the house structure, then add the roof details before working on the door and windows. Use black icing for cracks, bricks, and spider webs to create an aged look.
Finish the base with green crumbs or sprinkles and place small pumpkins around the walkway for a complete Halloween scene.
FAQs
What Are the Easiest Halloween Crafts for Kids?
Start with paper plates, toilet paper rolls, popsicle sticks, or construction paper because they are easy to find and simple to work with.
If you want a quick project, choose crafts that need only cutting, gluing, and coloring.
For younger kids, keep the shapes simple and let an adult handle scissors or hot glue when needed.
How Can I Make Halloween Crafts Without Spending Much?
Use items you already have at home, such as cardboard, empty cans, paper bags, yarn, and leftover craft supplies.
You can turn these everyday materials into ghosts, bats, pumpkins, spiders, and other Halloween decorations with very little extra cost.
If you want to save more, collect recyclable materials before Halloween and keep a small craft box ready for quick projects.

Hi, my name is Zeeshan, and I am the founder of The Crafts Geek. I have been passionate about DIY projects, home organization, and creative problem-solving for years. Over time, I realized that simple storage solutions and practical DIY ideas can make a huge difference in how a home looks and functions.